 How To Have A Comfortable And Close Cut Wet Shave Every Time
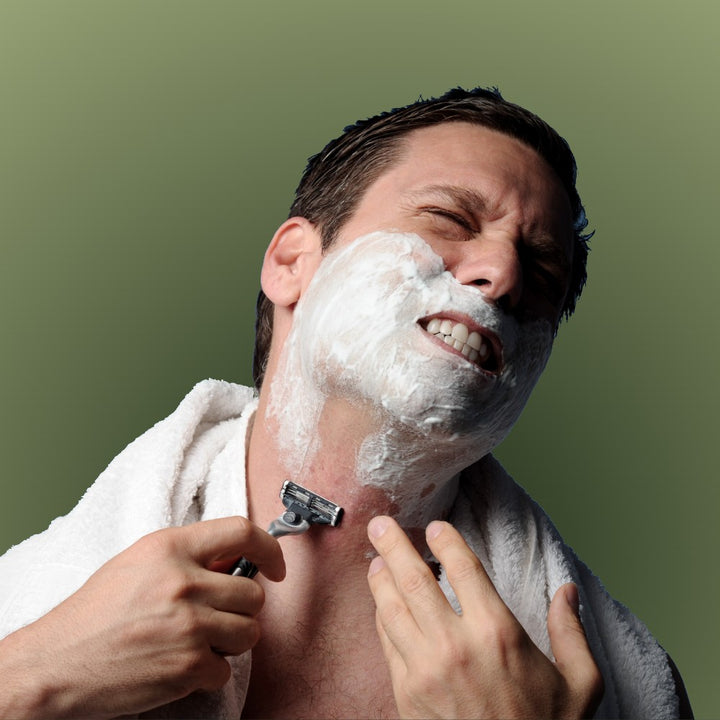
Because some level of skill is required, it is sometimes seen as an outdated method of shaving, however wet shaving with a traditional safety razor and brush can be a very satisfying experience, as well as provide a smooth comfortable shave that exceeds that given by a cartridge razor, providing the user has prepared effectively and has good technique. In fact, the element of skill is what converts most curious cartridge users into die hard wet shave aficionados.
By placing the power back into your hands, shaving can become enjoyable again.
So how do you get a comfortable shave if this is your first time with a safety razor?
First off, don't neglect the importance of prepping your beard beforehand by applying heat and moisture.
Ensuring the area that is to be shaved remains wet at all times is fairly obvious, as this reduces friction for the razor blade to effortlessly glide across your skin, but it also helps soften the bristles of the beard thereby making it easier to slice through and eliminate any tugging sensation.
Heat is important (using hot water rather than cold) because it opens up your pores which in turn loosens the grip on each hair follicle allowing you to cut as close to the base as possible for that super smooth shave. It also speeds up the time it takes for the hairs to absorb moisture and soften.
The act of shaving can be loosely split into 3 main stages Pre-Shave, Shave, and Post-Shave. The Pre-Shave stage is the act of preparing the skin, after all, you are about to scrape a sharp blade across your face and you want it to be ready! The Post-Shave stage is also very important as it is about maintaining the skin. The skin on your face is delicate and the act of shaving is very aggressive so it is important to keep it in good condition.
The following step by step instruction may seem long but it has been split out like this to ensure it is easy to understand and follow. Once you have done it a few times it will become second nature and won’t seem quite so complicated.
PLANNING
There is also the initial planning stage but this isn’t something that needs to be done every time you shave, it just needs to be done once and from then on kept in mind when shaving.
0. You need to plan your route. Take a good look and feel of the direction of hair growth and notice how it doesn’t simply grow downward. This is especially true on the neck where some patches can grow in the opposite direction. It is very important that you cut with and never against the hair growth on your first pass as this can lead to cuts, razor burn, bumps and ingrown hairs. It may take a while before you have mastered shaving with the direction of your hair but once you do the quality of your shave will skyrocket.
PRE-SHAVE - How To Prepare Your Face For Maximum Comfort
Arguably, the preparation you do beforehand is more important than the shave itself. Here you’ll learn how to drastically improve the feel of your shaves through a few easy to follow tips.
1. Having soft hairs will make the job easiest. The way to do this is to have a nice hot shower or bath before shaving as this softens the beard and opens the pores thereby weakening their grip on the hair. If this isn’t an option, the same effect can be achieved from applying a hot towel to your face for at least 2 and a half minutes. This is the amount of time it takes for facial hair to fully hydrate and soften according to Hollander and Casselman who wrote one of the first shaving academic papers.
2. Clean the face with face wash and/or scrub, making sure to rinse with warm water. This removes any unwanted grit and dead skin that can get in the way of a smooth shave. When using a facial scrub to exfoliate the skin, gently rub into skin using small circles. Do not press hard, you want to be able to feel the beads of the scrub moving around your face, not scratching it.
3. You can use a shaving oil/pre-shave cream for an extra close shave or if you have particularly sensitive skin it will provide an extra layer of lubrication to protect it. It’s also useful to soften the beard and further prepare it for shaving. Allow it to soak in for at least a full minute before you apply your lather to reap the full benefit.
4. Pre-soak your brush. If using a natural hair brush such as boar or badger hair, leave to soak in warm water for a few minutes to absorb the moisture, then let the excess water drip off. With a synthetic hair brush simply dip it into warm water and let it soak there for a few seconds then take it out and allow most of the moisture to drip off. Your shaving brush needs to be damp, not soaking wet.
5. (For soaps) Load your brush by working the tips on top of the soap.
This should take 10-15 seconds and the point is to accumulate soap on the brush which we're about to use to create a lather in a separate bowl or mug.
5. (For creams) Load your brush by adding an almond-sized dollop of shaving cream to the tips of your brush. Use your finger to transfer the cream from the jar onto the brush. If you add a wet brush directly to your cream jar, you will dilute it with water and potentially ruin it.
6. Start working your loaded brush in a bowl or mug, using a circular motion until a thick lather is created (this should take between 30 seconds and 2 minutes depending on skill and product you’re using). Add just a drop of water at a time, as the lather thickens, to increase volume. The trick is to use the tips of the brush hairs, don’t press so hard that the bristles fully splay out. You can also use a side to side motion. You should end up with a rich meringue-like lather.
7. Rub the brush all over the hairy bits of your face (avoid eyebrows) in a circular motion for a mild bit of exfoliation and to prime the hairs for shaving by lifting them up.
If the lather is still too dry and not creamy then you can dip the tip of the brush in water (or add a drop or two to the bowl) and try again. This can depend on the hardness of the water and the type of soap so just keep adding a tiny bit of water and trying again until a thick and creamy lather is formed. Be careful not to use too much water as this can create a lather that is too wet. An over-watered lather will be runny, with large sudsy bubbles. You can keep working the lather until it thickens but sometimes it's best to pour out the excess water and start again with more soap/cream.
8. Leave the santa beard on for 30 seconds so it gets time to absorb into the hairs and further soften them.
Creating a proper lather is a skill in itself and can take a while before you’re able to judge when at its best. Perseverance will pay off but if you're really struggling, check out our guide on how to get the perfect shaving lather
SHAVE - How To Achieve The Closest, Most Enjoyable Shave Of Your Life
Now we’re getting to the good bit!
Your first shave with a single blade will always be a bit tricky but if you follow these steps you’ll be a shaving god in no time.
9. First, warm your razor in the sink or under a hot running tap (it should feel pleasantly hot to the touch, not painful). This helps it to glide across the skin.
10. Gently shave your face in the direction of the hair growth, making sure to grip the handle between the tips of your thumb, middle and index finger. Gripping at the base helps you to maintain gentle pressure if using a short-handled razor. For longer handled razors, grip it in the middle.
Important Tips
- Keep the blade at a 30 degree angle to your skin at all times, you should be continually adjusting as you navigate the contours of your face. This is important to ensure that your shave is comfortable but also so the length your hairs are being cut at are consistent and you won’t need to do unnecessary extra passes which can lead to irritation.
- Do not apply firm pressure to your face, let the weight of the razor glide along your skin. Too much pressure can lead to razor burn. When done correctly you should barely feel the razor at all.
- Aim for short passes of the blade. This ensures you maintain the correct angle for each section of your face and prevents hairs getting missed.
- Make sure to rinse the blade under hot water between each pass of the razor to ensure it stays clean. Too much debris on the blade can inhibit its ability to cleanly cut your stubble and cause skipping of hairs.
- Never go over the same area more than once as there will no longer be any lather there for protection. Always re-lather an area you are going to shave again.
- It's easier to shave a flat surface so, gently, pull the skin taut with your other hand in the opposite direction to where your razor is travelling (if you're shaving down, pull the skin up). Be careful not to over-stretch the skin, this can cause ingrown hairs.
The first pass of the razor is to get rid of most of the hairs, but it won't be super smooth.
11. To get an even closer shave; re-lather and cut across the direction of hair growth rather than with it (at a 90 degree angle). This should only be done once you have first made a pass with the direction of the hair growth. You can then do the same from the other direction and finally against the growth however this is not recommended for those with sensitive skin, or beginners, as it can cause razor burn and lead to ingrown hairs. The reason we attack from multiple angles before going against the grain is to reduce the chance of irritation and ingrown hairs.
Most wet shavers will do a 2 or 3 pass shave: Once in the direction of hair growth, once coming in from the side and once coming from the opposite side. Only those with perfect technique and tough skin should go on to doing a 4th pass, once against the direction of the hair growth.
POST-SHAVE - How To Have Smooth Skin Without Any Irritation Or Redness
If you’ve been following the steps so far your skin will be properly hydrated, hairs will have been cut comfortably and you’re probably about ready to face the day head-on.
But we’re not done yet! No matter how expertly you carve that stubble, shaving will always be relatively harsh on your skin so you need to treat it right.
Finish up every morning routine with these age-defying habits and you’ll be complemented on the youthfulness of your complexion for many years to come.
12. Rinse your face in clean warm water to remove any stray bits of lather and cut hairs. Don't use the warm water from the sink as this will have bits of hair and soap in it and at this point we want to cleanse the pores of any potential cause of irritation.
13. Now rinse your face in clean cold water to close your pores. This will also help to reduce the bleeding if you have any nicks as well as reduce the chance for irritation and redness.
14. Use alum to close cuts. If you have had any nicks or razor burn you can moisten the tip of an alum matchstick or block and dab it onto the area as this will help to stop the bleeding.
15. Pat face semi-dry with a clean towel (check in, and behind, your ears for stray lather!). Never rub your face dry with the towel as you'll draw away too much moisture. You want your skin to still have a dewy texture for the next step.
16. Finish up with a post-shave balm to sooth the skin and protect it from the elements, apply in circular motion using your fingertips. Remember, a little goes a long way. If your face looks or feels greasy afterwards, you’ve used too much.
17. Wait a few minutes for the balm to fully absorb and then follow up with your daily moisturiser. Yes, it's important to use both.
18. If using, apply your favourite cologne and start the day knowing you’re looking your finest
Do not apply alcohol based aftershave/cologne directly to newly exfoliated skin after shaving as this can cause dryness and inflammation. Instead apply it to the back of the earlobes, wrists or back of the neck. These are hot spots that will release the fragrance throughout the day.
For an alcohol-free form of cologne, check out solid colognes.
Some other great shaving guides include: